Blue Bird Pom Pom Craft
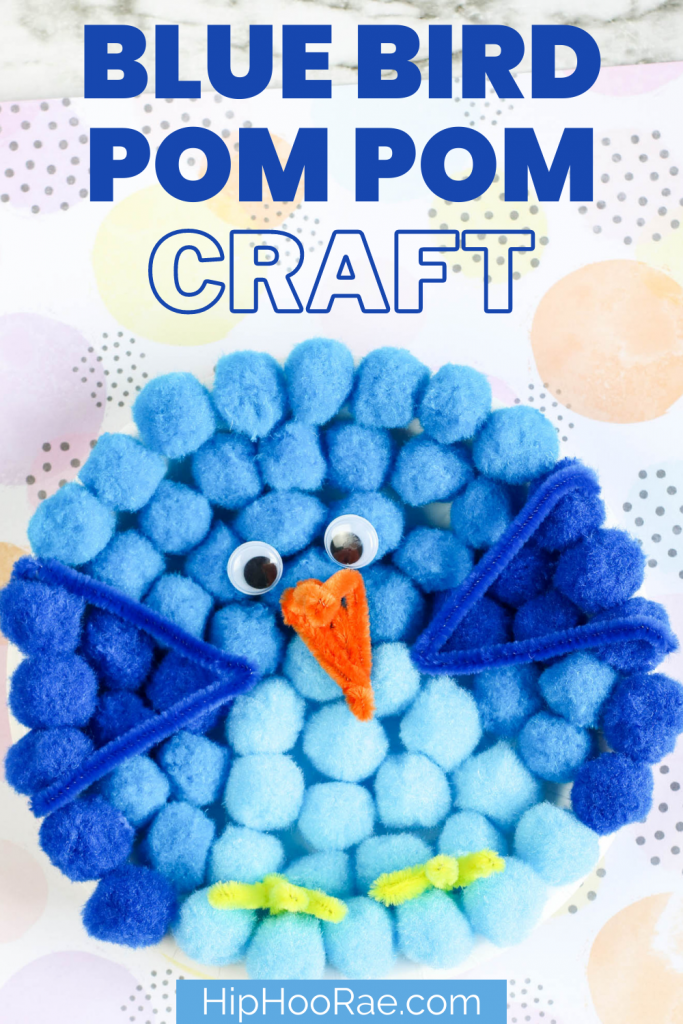
How To Make a Blue Bird Paper Plate Craft
What is it about crafts and children? They just love any opportunity to be creative, stick things together, paint, and generally make their own wonderful masterpieces that they are proud of. But for parents, it can often fill you with dread. You might find some incredible looking crafts and then not have any clue how to recreate them at home. Leading to disappointment from all. However, I have found a wonderful paper plate craft that your children will love.
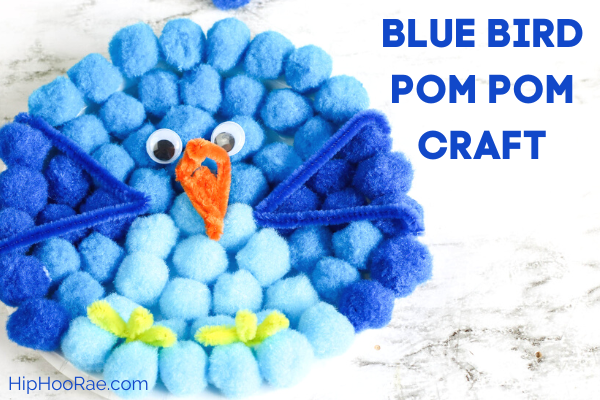
Paper plates are often a craft staple, so they are always good to have in your home as you can look to create some different creations from them. This paper plate baby bird craft is one of them. One of those crafts that you can make throughout the year it is easy to make, simple enough for your children to understand the concept, and they look super cute. So if you want to make this Blue Bird Pom Pom Paper Plate craft then read on to find out how.
Everything that you need to create the Blue Bird Paper Plate Craft
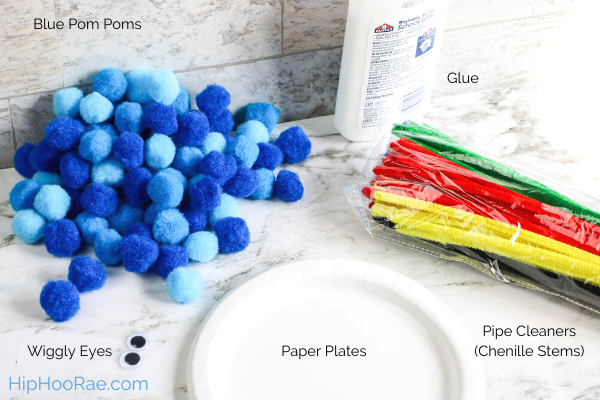
The great thing about the Blue Bird Paper Plate Pom Pom Craft is that you will likely have everything you need in a drawer or a craft cupboard. Here are the essentials you need to start creating the Paper Plate Baby Bird Craft.
- 7-inch paper plate (dessert size)
- Blue Pom Pom balls (in 3 shades if available)
- 2 wiggly eyes
- 1 blue pipe cleaners (chenille stems)
- 1 yellow pipe cleaners (chenille stems)
- 1 orange pipe cleaners (chenille stems)
- Quick-dry tacky glue or school glue
How to make the Pom Pom Bird Craft
Now that you have everything that you need it is now time to start creating. There will be times when you will need to help younger children with parts such as applying the glue or using the scissors.

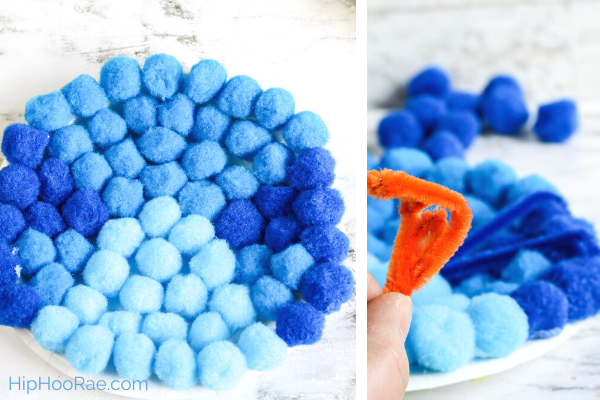
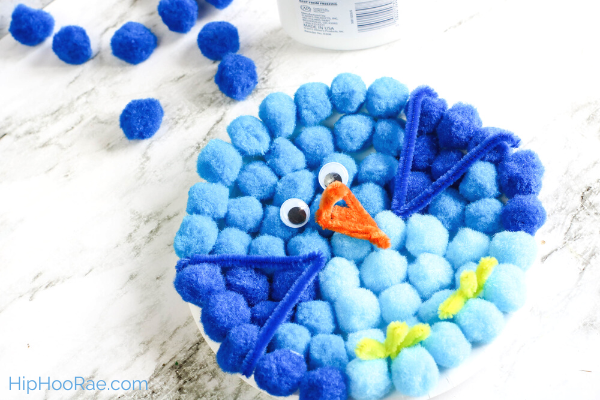
1. Get your paper plate and your pom poms together. Using the pictures as a guide, glue the pom poms to the paper plate. If using 3 shades of blue as pictured, start with the wings first, then the breast area, and finally the top. Using a different shade for each section.
2. Twist the orange chenille stem into a beak shape. Glue into place. Again you can use the pictures as a guide.
3. Cut one yellow chenille stem in half. Twist each half into bird feet. Use the pictures as a guide if needed. Glue into place.
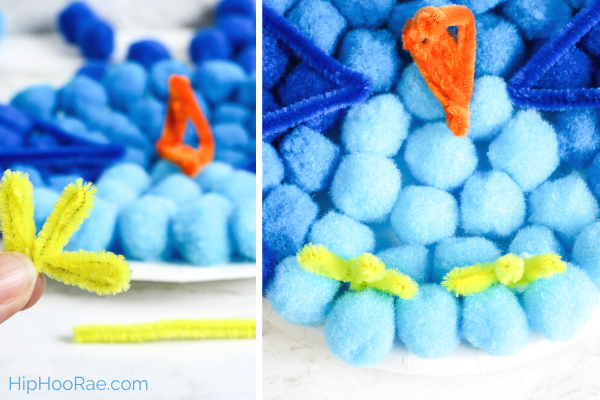
4. With the blue chenille stem, cut in half and shape into wings. Use the pictures as a guide if needed. Glue into place.
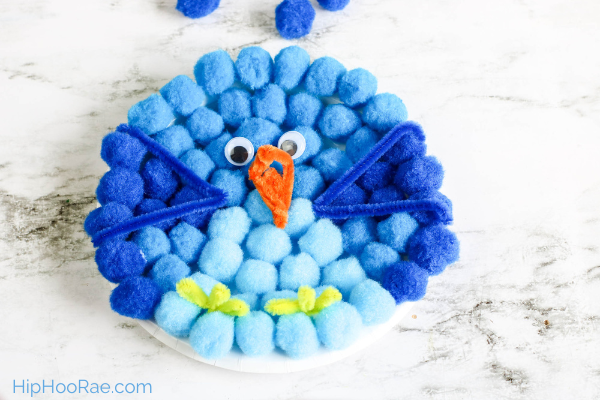
Glue the wiggly eyes to each side of the beak.
Voila! You have your Blue Bird Paper Plate Craft.
Extra notes and tips that could help
When it comes to crafts we all know that they often can be a little stressful for parents. So here are a few extra notes and tips to ensure that this crafting session goes smoothly and everyone enjoys making the pom pom paper plate craft.
- As we are using scissors and glue for this craft, you may need to be close at hand to help younger children with applying the glue and using the scissors safely.
- Get everything together in sections for your children so they can visually see it in front of them. This will help them to follow the method themselves as they get older and enable you to let them enjoy the crafting session.
- This is a great craft for fine motor skills as they pick out each pom pom and stick them down, so try, where possible, to let them do this part on their own. It may take some time, but they will really enjoy it and it is great for their development.
- Encourage play after the paper plate baby bird craft has been created. This is where you can move forward from the craft and encourage other things such as writing and role play.
Variations to try
Of course, like with anything, you don’t need to follow this guide word for word and you could vary the craft to suit what your children want to do, their ages, or even enhance them in some way. So here are a few variations that you might want to try.
- If you wanted to make a couple of different baby birds then why not create different ones in different colors? You could find three shades of other colors like yellow and green. Let your child choose the color they want and then let their imaginations run wild with it
- This could be a craft you do at Christmas and instead. You could recreate a robin on the paper plate by using a brown, a red for the red breast and another shade like a gray for the other parts of the bird. You could easily display this on the wall at Christmas time.
- Why not make spring chickens? You could focus on the color yellow for this and make spring chickens.
- Instead of pom poms on the wings, you could use craft feathers in the same color. This will add texture and give a different overall impression.
FAQs
All of us will have questions, and you may not have 100% confidence in your crafting skills. Here are a couple of questions that will hopefully offer an answer. However, you can always comment if I haven’t covered it here.
A great tip is to get everything out before you start crafting, and before your children even have an idea of what they are doing. It gives you a chance to spread it all out and also allows for the activity to run seamlessly. It also enables them to try and do this craft unaided. It is a great activity for fine motor skills as they need to use the pincer grip for the pom poms.
Pom poms are what the craft calls for, but get creative if you don’t have enough, or you don’t have different shades. You could use rolled-up tissue paper, craft feathers or even make it a nature exercise and use things you have collected in the garden.
This is suitable as a bird craft for toddlers and kids as long as they enough supervision when using scissors as small objects like the pom poms and wiggly eyes.
Hopefully, you will all have fun creating the paper plate baby bird craft, I am sure the kids have now got lots of pom pom craft ideas they would like to create, so get crafting
